.png)
Restoring a Burned Worktop to Perfection
- The Repair Team

- Dec 5, 2024
- 1 min read
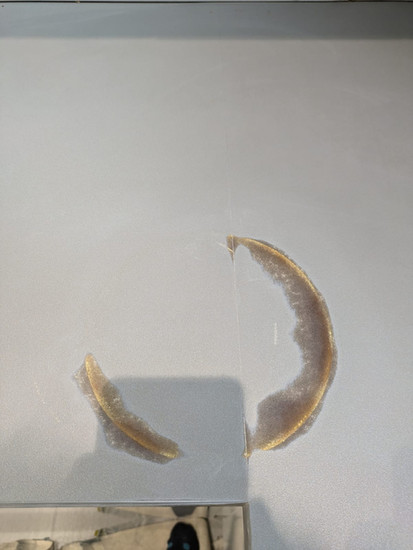
At The Repair Team, we specialise in transforming damaged surfaces into flawless finishes. In this post, we’re showcasing a recent project where we repaired a worktop with a noticeable burn mark. Here's how Rich, our skilled technician, brought it back to life:
Assessing & Preparing the Damage
Upon arrival, our technician carefully assessed the burn mark and decided on the best repair approach. We began by sanding down raised areas to make the surface flush, followed by applying a two-part self-levelling filler to address deeper imperfections. While the filler cured, we worked on matching the base colour to the original surface.
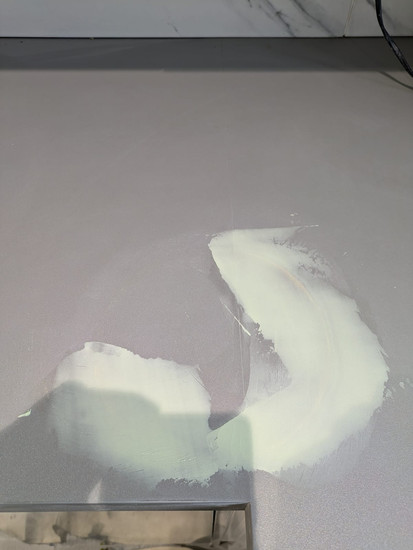
Smoothing & Colour Matching
Once cured, the filler was sanded smooth and level. We then applied an adhesion promoter to ensure a strong bond, followed by spraying layers of the custom base colour for even and seamless coverage.
Adding Detail & Protecting the Finish
To replicate the worktop’s original texture, we added fine speckles and details using precision brushes. Finally, a clear coat was applied at the correct gloss level, providing durability and completing the repair.
Final Touch: Customer Aftercare
Before wrapping up, we gave the customer guidance on how to care for the repaired surface to keep it in pristine condition.
This project is a testament to our commitment to restoring surfaces with skill and precision. If you have a damaged surface in need of repair, contact The Repair Team today – we’ll bring your surfaces back to life!


Stay tuned for more repair transformations and tips in future blog posts!


Comments